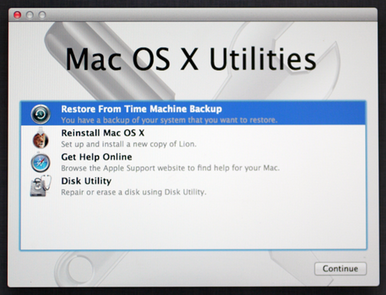
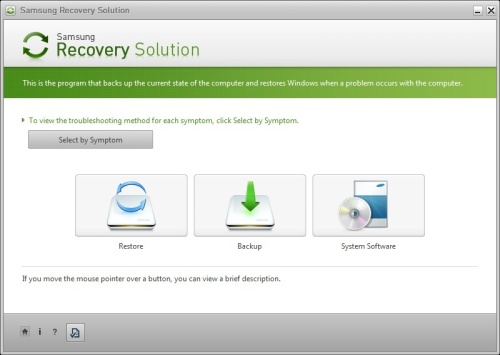
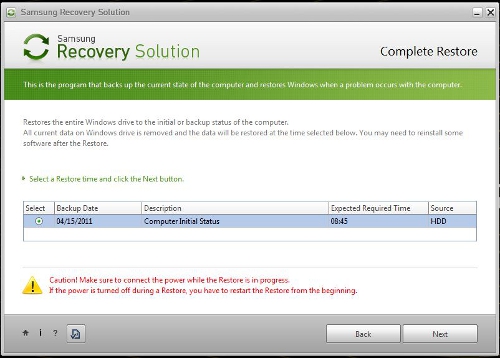
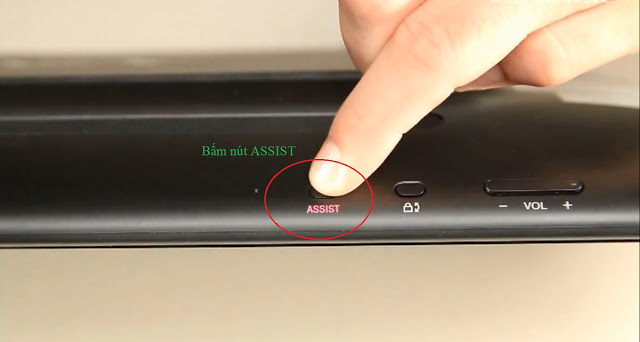
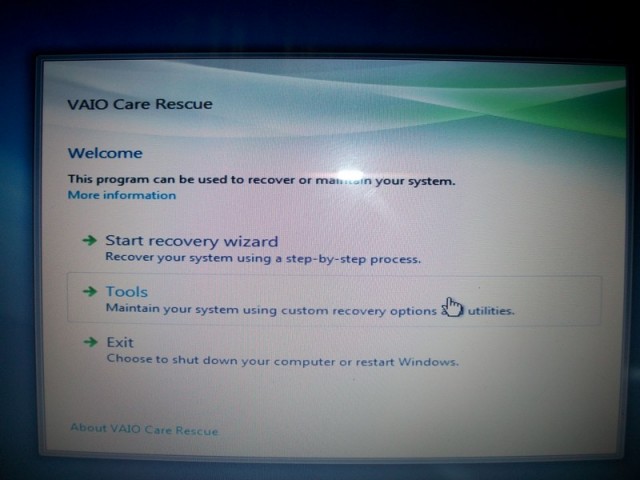
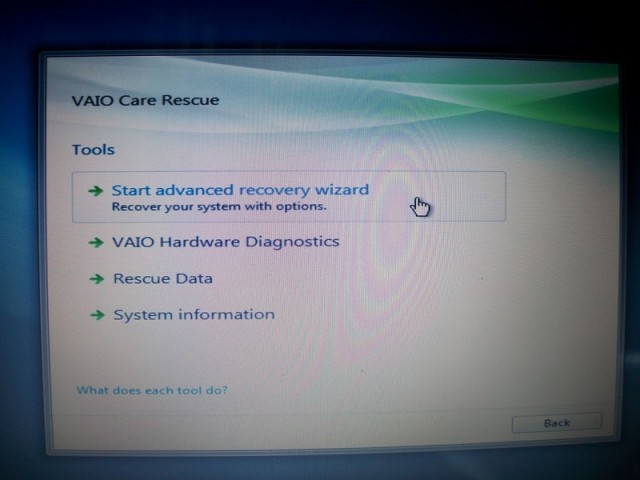
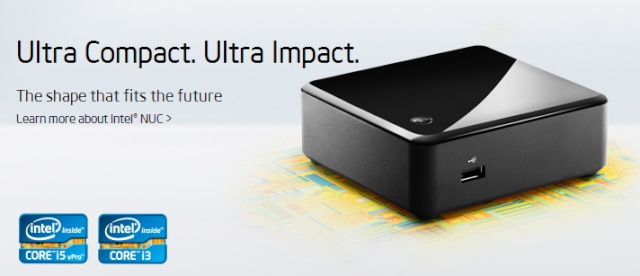
Click tên từng dòng máy để xem hướng dẫn trình tự Recovery: Acer, Asus, Dell, HP/Compaq, Gateway, Lenovo, MacBook, Samsung, Sony Vaio, Toshiba, Intel NUC, Surface và Fujitsu.
- Trình tự Recovery cho các loại laptop:


Ngày nay Laptop đã trở thành “người bạn” không thể thiếu đối với nhiều người trong chúng ta. Từ học sinh, sinh viên đến nhân viên, công chức, doanh nhân… đều sử dụng laptop. Sự vận hành ổn định và bền bỉ của chiếc laptop có ảnh hưởng không nhỏ đến hiệu quả trong học tập lẫn trong công việc của mỗi người. Trong đó Hệ điều Hành (HĐH) là một trong những nhân tố quan trọng hàng đầu.
- Đặc biệt đối với laptop đã tích hợp sẵn HĐH bản quyền từ nhà sản xuất. Trong quá trình sử dụng do những nguyên nhân khách quan hoặc chủ quan (hư ổ cứng, định dạng nhầm phân vùng, virus ….) có thể dẫn đến bị lỗi HĐH có bản quyền này.
- Khi đó khách hàng có thể nghĩ đến việc khôi phục lại nguyên trạng của HĐH như trước đây.
Những ưu điểm của việc recovery lại HĐH:
+ Quá trình Recovery sẽ đưa HĐH về trạng thái mới như lúc mới xuất xưởng.
+ Là phiên bản Windows chính gốc của hãng, chưa qua bất kỳ bàn tay chỉnh sửa nào của người dùng do đó bảo đảm được tính nguyên vẹn và độ ổn định cao nhất. Điều này đã được hầu hết người sử dụng thừa nhận.
+ Là bản Windows đã tích hợp những phần mềm tiện ích và trình điều khiển (driver) của nhà sản xuất kèm theo. Bạn không phải mất công tìm kiếm và cài đặt lại từng cái, chưa kể những lỗi hệ thống có thể phát sinh trong quá trình cài đặt. Đây là việc khá khó khăn đối với những ai không rành về IT.
+ Bản quyền Windows của máy cũng được khôi phục và kích hoạt một cách tự động mà bạn không cần phải nhập lại mã. Từ lúc này bạn có thể cập nhật trực tiếp những tiện ích hỗ trợ mới nhất từ nhà sản xuất cho HĐH của mình rồi đó.
- Cách Setup BIOS:
- Khi khởi động máy lần đầu tiên, máy tính sẽ đọc một tập hợp dữ liệu được lưu trong CMOS (một chip bộ nhớ đặc biệt luôn hoạt động nhờ 1 cục pin nhỏ), không có thông tin nầy máy tính sẽ bị tê liệt. Việc xác lập các thông tin nầy gọi là Setup Bios và bao giờ người bán cũng phải làm thủ tục Setup Bios ngay sau khi ráp máy. Nhưng bạn cũng phải biết cách Setup Bios để đề phòng trường hợp máy tự mất các thông tin lưu trong Bios vì các lý do như: Hết pin, nhiễu điện, virus... Hiện nay, người ta dùng Flash Ram để lưu thông tin Bios nên không cần phải có Pin nuôi trên mainboard. Tùy Mainboard, các mục trong Bios có thể khác nhau theo từng hãng chế tạo (Award, Ami, Pheonix...) nhưng về căn bản chúng vẫn giống nhau và trong phần nầy chủ yếu bàn về căn bản, còn các tính năng riêng bạn phải chịu khó tìm hiểu thêm nhờ vào các kiến thức căn bản nầy.
Màn hình Bios Setup đa số là màn hình chạy ở chế độ TEXT. Gần đây đang phát triển loại BiosWin (Ami) có màn hình Setup gồm nhiều cửa sổ giống tương tự Windows và sử dụng được Mouse trong khi Setup nhưng các mục vẫn không thay đổi.
Chú ý thao tác để vào Bios Setup là: Bấm phím Del khi mới khởi động máy đối với máy Ðài Loan. Ðối với các máy Mỹ, thường là bạn phải thông qua chương trình quản lý máy riêng của từng hãng nếu muốn thay đổi các thông số của Bios.
* Bios thường: Di chuyển vệt sáng để lựa chọn mục bằng các phím mũi tên. Thay đổi giá trị của mục đang Set bằng 2 phím Page Up và Page Dn. Sau đó nhấn phím Esc để thoát khỏi mục (giá trị mới sẽ được lưu trữ). Nhấn F10 để thoát Setup Bios nếu muốn lưu các thay đổi, khi hộp thoại hiện ra, bấm Y để lưu, N để không lưu. Nhấn Esc nếu muốn thoát mà không lưu thay đổi, khi hộp thoại hiện ra, bấm Y để không lưu, N để trở lại màn hình Setup Bios.
* Bios Win: Màn hình Setup xuất hiện dưới dạng đồ họa gồm nhiều cửa sổ, sử dụng được mouse nếu bạn có mouse loại: PS/2 mouse, Microsoft mouse, Serial mouse, Logitect C mouse. Dùng mouse bấm kép vào cửa sổ để mở một thành phần, bấm vào mục cần thay đổi, một cửa sổ liệt kê giá trị xuất hiện, bấm vào giá trị muốn chọn rồi thoát bằng cách bấm vào ô nhỏ ở góc trên bên trái. Nếu không có mouse, dùng các phím mũi tên để di chuyển, đến mục cần thay đổi bấm Enter, xuất hiện hộp liệt kê, chọn giá trị mới, bấm Enter, cuối cùng bấm Esc.
1. Setup các thành phần căn bản (Standard CMOS Setup):
Ðây là các thành phần cơ bản mà Bios trên tất cả các loại máy PC phải biết để quản lý và điều khiển chúng.
* Ngày, giờ (Date/Day/Time):
Bạn khai báo ngày tháng năm vào mục nầy. Khai báo nầy sẽ được máy tính xem là thông tin gốc và sẽ bắt đầu tính từ đây trở đi. Các thông tin về ngày giờ được sử dụng khi các bạn tạo hay thao tác với các tập tin, thư mục. Có chương trình khi chạy cũng cần thông tin nầy, thí dụ để báo cho bạn cập nhật khi quá hạn, chấm dứt hoạt động khi đến ngày quy định...Bình thường bạn Set sai hay không Set cũng chẳng nh hưởng gì đến hoạt động của máy. Các thông tin nầy có thể sửa chữa trực tiếp ngoài Dos bằng 2 lịnh Date và Time, hay bằng Control Panel của Windows mà không cần vào Bios Setup.
Chú ý: Ðồng hồ máy tính luôn luôn chạy chậm khong vài giây/ngày, thỉnh thoảng bạn nên chỉnh lại giờ cho đúng. Nhưng nếu quá chậm là có vấn đề cần phải thay mainboard.
* ổ đĩa mềm (Drive A/B):
Khai báo loại ổ đĩa cho ổ A và ổ B, bạn căn cứ vào việc nối dây cho ổ đĩa để xác định. ổ đĩa nối với đầu nối ngoài cùng của dây nối là ổ A, ổ kia là B. ổ có kích thước lớn là 1.2M 5.25 inch, ổ nhỏ là 1.44M 3.5 inch. Nếu không có thì chọn Not Installed. Nếu bạn khai báo sai, ổ đĩa sẽ không hoạt động chớ không hư hỏng gì, bạn chỉ cần khai báo lại. Trong các mainboard sử dụng Bios đời mới, khai báo sai loại ổ dĩa 1.2Mb thành 1.4Mb hay ngược lại, ổ dĩa vẫn hoạt động bình thường nhưng kêu rất lớn lúc mới bắt đầu đọc đĩa, về lâu dài có thể hư đĩa.
Các Bios và các card I/O đời mới cho phép bạn tráo đổi 2 ổ đĩa mềm mà không cần tráo đổi dây (swap floppy drive), tức là ổ A thành ổ B và ngược lại khi sử dụng. Khi tráo đổi bằng cách Set jumper trên card I/O, bạn nhớ khai báo lại trong Bios Setup (Khi tráo bằng lịnh Swap trong Bios thì không cần khai báo lại), nhưng có ứng dụng không chịu cài đặt khi Swap đĩa mềm, nhất là các ứng dụng có bảo vệ chống sao chép.
* ổ đĩa cứng (Drive C/D) loại IDE:
Phần khai báo ổ đĩa cứng rắc rối hơn, bắt buộc bạn phải khai báo chi tiết các thông số, bạn khai báo sai không những ổ cứng không hoạt động mà đôi khi còn làm hư ổ cứng nếu bạn khai báo quá dung lượng thật sự của ổ cứng và cho tiến hành FDISK, FORMAT theo dung lượng sai nầy. May mắn là các Bios sau nầy đều có phần dò tìm thông số ổ cứng IDE tự động (IDE HDD auto detection) nên các bạn khỏi mắc công nhớ khi sử dụng ổ đĩa cứng loại IDE. Chúng tôi sẽ nói về phần auto detect nầy sau. Ngoài ra, các ổ cứng sau nầy đều có ghi thông số trên nhãn dán trên mặt. Bạn cho chạy Auto detect, Bios sẽ tự động điền các thông số nầy dùm bạn. Việc khai báo ổ cứng C và D đòi hỏi phải đúng với việc Set các jumper trên 2 ổ cứng. Bạn xác lập ổ cứng không phải qua đầu nối dây mà bằng các jumper trên mạch điều khiển ổ cứng. Các ổ cứng đời mới chỉ có một jumper 3 vị trí: ổ duy nhất, ổ Master (ổ C), ổ Slave (ổ D) và có ghi rõ cách Set trên nhãn. Các ổ đĩa cứng đời cũ nhiều jumper hơn nên nếu không có tài liệu hướng dẫn là rắc rối, phải mò mẫm rất lâu.
* ổ đĩa cứng (Drive E/F) loại IDE:
Các Bios và các card I/O đời mới cho phép gắn 4 ổ dĩa cứng, vì hiện nay các ổ dĩa CDROM cũng sử dụng đầu nối ổ cứng để hoạt động, gọi là CDROM Interface IDE (giao diện đĩa IDE) để đơn giản việc lắp đặt.
Chú ý: Khai báo là NONE trong Bios Setup cho ổ đĩa CD-ROM.
* Màn hình (Video) - Primary Display:
EGA/VGA: Dành cho loại màn hình sử dụng card màu EGA hay VGA, Super VGA.
CGA 40/CGA 80: Dành cho loại màn hình sử dụng card màu CGA 40 cột hay CGA 80 cột.
Mono: Dành cho loại màn hình sử dụng card trắng đen, kể c card VGA khi dùng màn hình trắng đen.
* Treo máy nếu phát hiện lỗi khi khởi động (Error Halt):
Tất cả lỗi (All error): Treo máy khi phát hiện bất cứ lỗi nào trong quá trình kiểm tra máy, bạn không nên chọn mục nầy vì Bios sẽ treo máy khi gặp lỗi đầu tiên nên bạn không thể biết các lỗi khác, nếu có.
Bỏ qua lỗi của Keyboard (All, But Keyboard): Tất cả các lỗi ngoại trừ lỗi của bàn phím.
Bỏ qua lỗi đĩa (All, But Diskette): Tất cả các lỗi ngoại trừ lỗi của đĩa.
Bỏ qua lỗi đĩa và bàn phím (All, But Disk/Key): Tất cả các lỗi ngoại trừ lỗi của ổ đĩa và bàn phím.
Không treo máy khi có lỗi (No error): Tiến hành quá trình kiểm tra máy cho đến khi hoàn tất dù phát hiện bất cứ lỗi gì. Bạn nên chọn mục nầy để biết máy bị trục trặc ở bộ phận nào mà có phương hướng giải quyết.
* Keyboard:
Install: Cho kiểm tra bàn phím trong quá trình khởi động, thông báo trên màn hình nếu bàn phím có lỗi.
Not Install: Không kiểm tra bàn phím khi khởi động. Chú ý: chọn mục nầy không có nghĩa là vô hiệu hoá bàn phím vì nếu vậy làm sao điều khiển máy. Nó chỉ có tác dụng cho Bios khỏi mất công kiểm tra bàn phím nhằm rút ngắn thời gian khởi động.
2. Setup các thành phần nâng cao (Advanced Setup):
* Virut Warning:
Nếu Enabled, Bios sẽ báo động và treo máy khi có hành động viết vào Boot sector hay Partition của đĩa cứng. Nếu bạn cần chạy chương trình có thao tác vào 2 nơi đó như: Fdisk, Format... bạn cần phải Disable mục nầy.
* Internal cache:
Cho hiệu lực (enable) hay vô hiệu hoá (disable) Cache (L1) nội trong CPU 486 trở lên.
* External cache:
Cho hiệu lực (enable) hay vô hiệu hoá (disable) cache trên mainboard, còn gọi là Cache mức 2 (L2).
* Quick Power On Self Test:
Nếu enable Bios sẽ rút ngắn và bỏ qua vài mục không quan trọng trong quá trình khởi động, để giảm thời gian khởi động tối đa.
* About 1 MB Memory Test:
Nếu Enable Bios sẽ kiểm tra tất cả bộ nhớ. Nếu Disable Bios chỉ kiểm tra 1 Mb bộ nhớ đầu tiên.
* Memory Test Tick Sound:
Cho phát âm thanh (enable) hay không (disable) trong thời gian test bộ nhớ.
* Extended Bios Ram Area:
Khai báo mục nầy nếu muốn dùng 1 Kb trên đỉnh của bộ nhớ quy ước, tức Kb bắt đầu từ địa chỉ 639K hay 0:300 của vùng Bios hệ thống trong bộ nhớ quy ước để lưu các thông tin về đĩa cứng. Xác lập có thể là 1K hay 0:300.
* Swap Floppy Drive:
Tráo đổi tên 2 ổ đĩa mềm, khi chọn mục nầy bạn không cần khai báo lại loại ổ đĩa như khi tráo bằng cách Set jumper trên card I/O.
* Boot Sequence:
Chọn ổ đĩa cho Bios tìm hệ điều hành khi khởi động. Có thể là C rồi đến A hay A rồi đến C hay chỉ có C. Bạn nên chọn C,A hay chỉ có C, để đề phòng trường hợp vô tình khởi động bằng đĩa mềm có Virus.
Hiện nay trên các Mainboard Pentium. Bios cho phép bạn chỉ định khởi động từ 1 trong 2 ổ mềm hay trong 4 ổ cứng IDE hay bằng ổ cứng SCSI thậm chí bằng ổ CD Rom cũng được.
* Boot Up Floppy Seek:
Nếu Enable Bios sẽ dò tìm kiểu của đĩa mềm là 80 track hay 40 track. Nếu Disable Bios sẽ bỏ qua. Chọn enable làm chậm thời gian khởi động vì Bios luôn luôn phải đọc đĩa mềm trước khi đọc đĩa cứng, mặc dù bạn đã chọn chỉ khởi động bằng ổ C.
* Boot Up Numlock Status:
Nếu ON là cho phím Numlock mở (đèn Numlock sáng) sau khi khởi động, nhóm phím bên tay phải bàn phím dùng để đánh số. Nếu OFF là cho phím Numlock tắt (đèn Numlock tối), nhóm phím bên tay phải dùng để di chuyển con trỏ.
* Boot Up System Speed:
Quy định tốc độ của CPU trong thời gian khởi động là High (cao) hay Low (thấp).
* Memory Parity Check:
Kiểm tra chẵn lẻ bộ nhớ. Chọn theo mainboard vì có loại cho phép mục nầy enable, có loại bắt bạn phải disable mới chịu chạy. Ðầu tiên bạn chọn enable, nếu máy treo bạn chọn lại là disable. Mục nầy không ảnh hưởng đến hệ thống, chỉ có tác dụng kiểm tra Ram.
* IDE HDD Block Mode:
Nếu ổ đĩa cứng của bạn hỗ trợ kiểu vận chuyển dữ liệu theo từng khối (các ổ đĩa đời mới có dung lượng cao). Bạn cho enable để tăng tốc cho ổ đĩa. Nếu ổ đĩa đời cũ bạn cho disable mục nầy.
* Pri. Master/Slave LBA (Logic Block Addressing) Mode:
Nếu 2 ổ đĩa cứng được nối vào đầu nối Primary của card I/O có dung lượng lớn hơn 528Mb, bạn cho enable mục nầy.
* Sec. IDE Ctrl Drives Install:
Mục nầy để khai báo máy bạn có ổ đĩa cứng nối vào đầu nối Secondary của card I/O. Các chỉ định có thể là Master, Mst/Slv và disable.
* Sec Master/Slave LBA Mode:
Xác lập LBA cho đầu nối thứ 2.
Chú ý: Các mục hỗ trợ cho ổ đĩa cứng có dung lượng lớn và các card I/O đời mới giúp bạn sử dụng ổ đĩa có dung lượng trên 528Mb. Trong trường hợp bạn cho enable các mục nầy rồi mới tiến hành Fdisk và Format đĩa, nếu sau đó bạn lại disable các mục nầy hay đem gắn qua máy khác cũng chọn disable, bạn sẽ không thể sử dụng được ổ dĩa cứng. Khi dùng ổ CDROM có đầu nối IDE, bạn nên gắn vào đầu nối Secondary để khỏi ảnh hưởng đến ổ dĩa cứng (gắn vào đầu nối Pri) khi cần chạy 32BitDiskAccess trong Windows.
* Typematic Rate Setting:
Nếu enable là bạn cho 2 mục dưới đây có hiệu lực. 2 mục nầy thay thế lịnh Mode của DOS, quy định tốc độ và thời gian trể của bàn phím.
* Typematic Rate (Chars/Sec):
Bạn lựa chọn số ký tự/giây tuỳ theo tốc độ đánh phím nhanh hay chậm của bạn. Nếu bạn Set thấp hơn tốc độ đánh thì máy sẽ phát tiếng Bip khi nó chạy theo không kịp.
* Typematic Delay (Msec):
Chỉ định thời gian lập lại ký tự khi bạn bấm và giữ luôn phím, tính bằng mili giây.
* Security Option:
Mục nầy dùng để giới hạn việc sử dụng hệ thống và Bios Setup.
Setup: Giới hạn việc thay đổi Bios Setup, mỗi khi muốn vào Bios Setup bạn phải đánh đúng mật khẩu đã quy định trước.
System hay Always: Giới hạn việc sử dụng máy. Mỗi khi mở máy, Bios luôn luôn hỏi mật khẩu, nếu không biết mật khẩu Bios sẽ không cho phép sử dụng máy.
Chú ý: Trong trường hợp bạn chưa chỉ định mật khẩu, để Disable (vô hiệu hoá) mục nầy, bạn chọn Password Setting, bạn đừng đánh gì vào các ô nhập mật khẩu mà chỉ cần bấm ENTER. Trong trường hợp bạn đã có chỉ định mật khẩu nay lại muốn bỏ đi. Bạn chọn Password Setting, bạn đánh mật khẩu cũ vào ô nhập mật khẩu cũ (Old Password) còn trong ô nhập mật khẩu mới (New Password) bạn đừng đánh gì cả mà chỉ cần bấm ENTER. Có mainboard thiết kế thêm 1 jumper để xoá riêng mật khẩu ngoài jumper để xoá toàn bộ thông tin trong CMOS. Tốt hơn hết là bạn đừng sử dụng mục nầy vì bản thân chúng tôi chứng kiến rất nhiều trường hợp dở khóc dở cười do mục nầy gây ra. Lợi ít mà hại nhiều. Chỉ những máy tính công cộng mới phải sử dụng tới mục nầy thôi.
* System Bios Shadow, Video Bios Shadow:
Nếu enable là cho copy các dữ liệu về System và Video trong Bios (có tốc độ chậm) vào Ram (tốc độ nhanh) để rút ngắn thời gian khi cần truy nhập vào các dữ liệu nầy.
* Wait for <F1> if Any Error:
Cho hiện thông báo chờ ấn phím F1 khi có lỗi.
* Numeric Processor:
Thông báo có gắn CPU đồng xử lý (Present) trên máy hay không (absent). Mục nầy thường có cho các máy dùng CPU 286, 386, 486SX. Từ 486DX trở về sau đã có con đồng xử lý bên trong CPU nên trên các máy mới có thể không có mục nầy.
* Turbo Switch Funtion:
Cho nút Turbo có hiệu lực (enable) hay không (disable). Mục nầy thường thấy ở các Bios đời củ, trên các máy đời mới lựa chọn nầy thường bằng cách Set jumper của Mainboard. Từ Mainboard pentium trở đi không có mục nầy.
3. Setup các thành phần có liên quan đến vận hành hệ thống (Chipset Setup):
* Auto Configuration:
Nếu enable, Bios sẽ tự động xác lập các thành phần về DRAM, Cache...mỗi khi khởi động tùy theo CPU Type (kiểu CPU) và System Clock (tốc độ hệ thống). Nếu Disable là để cho bạn tự chỉ định.
* AT Clock Option:
Nếu Async (không đồng bộ) là lấy dao động chuẩn của bộ dao động thạch anh chia đôi làm tốc độ hoạt động cho AT Bus (bus 8 - 16Bit). Thường là 14.318MHz/2 tức 7.159MHz. Có Bios còn cho chọn tốc độ của mục nầy là 14.318MHz. Nếu Sync (đồng bộ) là dùng System Clock (do bạn chỉ định bằng cách Set jumper trên mainboard) làm tốc độ chuẩn.
* Synchronous AT Clock/AT Bus Clock Selector:
Chỉ định tốc độ hoạt động cho AT Bus bằng cách lấy tốc độ chuẩn (system clock) chia nhỏ để còn lại khoảng 8MHz cho phù hợp với card 16Bit. Các lựa chọn như sau:
CLKI/3 khi system clock là 20 - 25MHz.
CLKI/4 khi system clock là 33MHz.
CLKI/5 khi system clock là 40MHz.
CLKI/6 khi system clock là 50MHz.
Tốc độ nầy càng lớn (số chia càng nhỏ), máy chạy càng nhanh do tăng tốc độ vận chuyển dữ liệu. Tuy nhiên lớn đến đâu là còn tùy thuộc vào mainboard và card cắm trên các Slot (quan trọng nhất là card I/O). Các bạn phải thí nghiệm giảm số chia từng nấc và chú ý máy có khởi động hay đọc đĩa bình thường không, nếu phát sinh trục trặc thì giảm xuống 1 nấc. Thường thì bạn có thể tăng được 2 nấc, thí dụ: System clock là 40MHz, bạn chọn CLKI/3. Card ISA 8 và 16 Bit có thể chạy tốt trong khoảng từ 8MHz đến 14MHz. Nếu nhanh quá, thường card I/O gặp trục trặc trước (không đọc được đĩa cứng).
* AT Cycle Wait States/Extra AT Cycle WS:
Ðể enable hay disable việc chèn thêm 1 thời gian chờ vào thời gian chuẩn của AT Bus. Nếu system clock dưới 33MHz chọn disable. Nếu trên 33MHz chọn enable.
* Fast AT Cycle:
Khi enable sẽ rút ngắn thời gian chuẩn của AT Bus.
* DRAM Read Wait States/DRAM Brust Cycle:
Dưới 33MHz là: 3 - 2 - 2 - 2 hay 2 - 1 - 1 - 1
Từ 33 - 45MHz là: 4 - 3 - 3 - 3 hay 2 - 2 - 2 - 2
50MHz là: 5 - 4 - 4 - 4 hay 3 - 2 - 2 - 2
Chọn mục nầy ảnh hưởng lớn đến tốc độ CPU.
* DRAM/Memory Write Wait States:
Chọn 1WS khi hệ thống nhanh hay DRAM chậm (tốc độ 40MHz trở lên). Chọn 0WS khi hệ thống và DRAM có thể tương thích (33MHz trở xuống).
* Hidden Refresh Option:
Khi enable, CPU sẽ làm việc nhanh hơn do không phải chờ mỗi khi DRAM được làm tươi.
* Slow Refresh Enable:
Mục nầy nhằm bảo đảm an toàn dữ liệu trên DRAM, thời gian làm tươi sẽ kéo dài hơn bình thường. Bạn chỉ được enable mục nầy khi bộ nhớ của máy hỗ trợ việc cho phép làm tươi chậm.
* L1 Cache Mode:
Lựa chọn giữa Write-Through và Write-Back cho Cache nội trong CPU 486 trở lên. Xác lập Write-Through máy sẽ chạy chậm hơn Write-Back nhưng việc lực chọn còn tuỳ thuộc vào loại CPU.
* L2 Cache Mode:
Xác lập cho cache trên mainboard.
* IDE HDD Auto Detection/IDE SETUP:
Khi chọn mục nầy sẽ xuất hiện một cửa sổ cho bạn chỉ định ổ đĩa cần dò tìm thông số (2 hay 4 ổ đĩa tuỳ theo Bios). Sau đó bạn bấm OK hay YES để Bios điền vào phần Standard dùm cho bạn. Trong Bios đời mới, Auto detect có thể đưa ra vài loại ổ đĩa. Tuỳ theo cách sử dụng ổ dĩa (normal, LBA,...) mà bạn chọn loại thích hợp.
* Power Management Setup:
Ðối với CPU 486:
Phần nầy là các chỉ định cho chương trình tiết kiệm năng lượng sẵn chứa trong các Bios đời mới. Chương trình nầy dùng được cho cả 2 loại CPU: Loại thường và loại CPU kiểu S. CPU kiểu S hay CPU có 2 ký tự cuối SL là một loại CPU được chế tạo đặc biệt, có thêm bộ phận quản lý năng lượng trong CPU. Do đó trong phần nầy có 2 loại chỉ định dành cho 2 loại CPU.
Ðối với Pentium:
Dùng chung cho mọi loại Pentium hay các chíp của các hảng khác cùng đời với Pentium.
* Power Management/Power Saving Mode:
Disable: Không sử dụng chương trình nầy.
Enable/User Define: Cho chương trình nầy có hiệu lực.
Min Saving: Dùng các giá trị thời gian dài nhất cho các lựa chọn (tiết kiệm năng lượng ít nhất).
Max Saving: Dùng các giá trị thời gian ngắn nhất cho các lựa chọn (tiết kiệm nhiều nhất).
* Pmi/Smi:
Nếu chọn SMI là máy đang gắn CPU kiểu S của hãng Intel. Nếu chọn Auto là máy đang gắn CPU thường.
* Doze Timer:
Mục nầy chỉ dùng cho CPU kiểu S. Khi đúng thời gian máy đã rảnh (không nhận được tín hiệu từ các ngắt) theo quy định, CPU tự động hạ tốc độ xuống còn 8MHz. Bạn chọn thời gian theo ý bạn (có thể từ 10 giây đến 4 giờ) hay disable nếu không muốn sử dụng mục nầy.
* Sleep Timer/Standby timer:
Mục nầy chỉ dùng cho CPU kiểu S. Chỉ định thời gian máy rảnh trước khi vào chế độ Sleep (ngưng hoạt động). Thời gian có thể từ 10 giây đến 4 giờ.
* Sleep Clock:
Mục nầy chỉ dùng cho CPU kiểu S: Stop CPU hạ tốc độ xuống còn 0MHz (ngưng hẳn). Slow CPU hạ tốc độ xuống còn 8MHz.
* HDD Standby Timer/HDD Power Down:
Chỉ định thời gian ngừng motor của ổ đĩa cứng.
* CRT Sleep:
Nếu Enable là màn hình sẽ tắt khi máy vào chế độ Sleep.
* Chỉ định:
Các chỉ định cho chương trình quản lý nguồn biết cần kiểm tra bộ phận nào khi chạy.
Chú ý: Do Bios được sản xuất để sử dụng cho nhiều loại máy khác nhau nên các bạn luôn luôn gặp phần nầy trong các Bios. Thực ra chúng chỉ có giá trị cho các máy xách tay (laptop) vì xài pin nên vấn đề tiết kiệm năng lượng được đặt lên hàng đầu. Chúng tôi khuyên các bạn đang sử dụng máy để bàn (desktop) nên vô hiệu hoá tất cả các mục trong phần nầy, để tránh các tình huống bất ngờ như: đang cài chương trình, tự nhiên máy ngưng hoạt động, đang chạy Defrag tự nhiên máy chậm cực kỳ...
4. Phần dành riêng cho Mainboard theo chuẩn giao tiếp PCI có I/O và IDE On Board (peripheral Setup):
* PCI On Board IDE:
Cho hiệu lực (enabled) hay vô hiệu (disabled) 2 đầu nối ổ đĩa cứng IDE trên mainboard. Khi sử dụng Card PCI IDE rời, ta cần chọn disabled.
* PCI On Board Secondary IDE:
Cho hiệu lực (enabled) hay vô hiệu (disabled) đầu nối ổ đĩa cứng IDE thứ 2 trên mainboard. Mục nầy bổ sung cho mục trên và chỉ có tác dụng với đầu nối thứ 2.
* PCI On Board Speed Mode:
Chỉ định kiểu vận chuyển dữ liệu (PIO speed mode). Có thể là Disabled, mode 1, mode 2, mode 3, mode 4, Auto. Trong đó mode 4 là nhanh nhất.
* PCI Card Present on:
Khai báo có sử dụng Card PCI IDE rời hay không và nếu có thì được cắm vào Slot nào. Các mục chọn là: Disabled, Auto, Slot 1, Slot 2, Slot 3, Slot 4.
* PCI IRQ, PCI Primary IDE IRQ, PCI Secondary IDE IRQ:
Chỉ định cách xác lập ngắt cho Card PCI IDE rời.
Chú ý: Trong mục nầy có phần xác lập thứ tự gán ngắt cho các Card bổ sung. Thí dụ: 1 = 9, 2 = 10, 3 = 11, 4 = 12 có nghĩa là Card đầu tiên cắm vào bất kỳ Slot nào sẽ được gán ngắt 9, nếu có 2 Card thì Card cắm vào Slot có số thứ tự nhỏ sẽ được gán ngắt 9, Slot có số thứ tự lớn sẽ được gán ngắt 10.v..v...
* IDE 32Bit Transfers Mode:
Xác lập nầy nhằm tăng cường tốc độ cho ổ đĩa cứng trên 528Mb, nhưng cũng có ổ đĩa không khởi động được khi enabled mục nầy dù fdisk và format vẫn bình thường.
* Host to PCI Post Write W/S, Host to PCI Burst Write, Host to DRAM Burst Write:
Các mục nầy xác lập cho PCU Bus, không ảnh hưởng nhiều đến tốc độ CPU, có thể để nguyên xác lập mặc nhiên.
* PCI Bus Park, Post Write Buffer:
Khi enabled các mục nầy có thể tăng cường thêm tốc độ hệ thống.
* FDC Control:
Cho hiệu lực hay không đầu nối cáp và xác lập địa chỉ cho ổ đĩa mềm.
* Primary Seral Port:
Cho hiệu lực hay không cổng COM 1 và xác lập địa chỉ cho cổng nầy.
* Secondary Serial Port:
Cho hiệu lực hay không cổng COM 2 và xác lập địa chỉ cho cổng nầy. Chú ý: Nếu bạn sử dụng Card bổ sung có xác lập điạ chỉ là COM 1 hay COM 2, bạn phải disabled cổng tương ứng trong hai mục trên.
* Parallel Port:
Cho hiệu lực hay không cổng LPT 1 và xác lập địa chỉ cho cổng nầy.
5. Hướng dẫn Setup Bios:
Trong các tài liệu đi kèm mainboard, đều có hướng dẫn Setup Bios. Khi mua máy hay mua mainboard, các bạn nhớ đòi các tài liệu nầy vì nó rất cần cho việc sử dụng máy.
Trong các phần Setup trên, phần Standard, Advanced có ảnh hưởng đến việc cấu hình máy. Phần Chipset ảnh hưởng đến tốc độ máy. Phần PCI ảnh hưởng đến các gán ngắt, địa chỉ cho các Slot PCI, cổng; cách vận chuyển dữ liệu cho IDE On Board.
Nếu gặp các thành phần hoàn toàn mới, trước tiên bạn hãy Set các thành phần đã biết, kiểm tra việc thay đổi của máy, cuối cùng mới Set tới các thành phần chưa biết. Chúng tôi xin nhắc lại, việc Setup Bios sai không bao giờ làm hư máy và các bạn sẽ dễ dàng Setup lại nhờ vào chính Bios. Trên mainboard luôn luôn có 1 Jumper dùng để xóa các thông tin lưu trong CMOS để bạn có thể tạo lại các thông tin nầy trong trường hợp không thể vào lại Bios Setup khi khởi động máy.
Khi tiến hành tìm hiểu Setup Bios, bạn nên theo một nguyên tắc sau: Chỉ Set từng mục một rồi khởi động máy lại, chạy các chương trình kiểm tra để xem tốc độ CPU, ổ đĩa có thay đổi gì không?. Cách làm nầy gíúp bạn phát hiện được ảnh hưởng của từng mục vào hệ thống và bạn có thể biết chắc trục trặc phát sinh do mục nào để sửa chữa. Khi xẩy ra trục trặc mà bạn không biết đối phó, bạn chỉ cần vào lại Bios Setup chọn Load Bios Default hay bấm F6 trong phần Set mà bạn muốn phục hồi sau đó khởi động máy lại là xong.


 Trang Chính
 Latest images

 Tường nhà
  Bài viết
  Kết bạn
  Ngăn cấm


 PC Restore by










 098 376 5575